Rocky Linux 是基于红帽Linux的开源免费企业级操作系统,因为红帽公司在Centos 8 后,转为steam方式了,因此你依然想用Centos 8,那就考虑转入Rocky Linux吧。下面,就是教你一步步实现在Rocky Linux 8.5中,安装 Apache, MariaDB, and PHP 8.1 (也即是所称的 LAMP环境)。
准备工作:
* VPS, Cloud, or Bare-Metal Server
* Running on Rocky Linux OS 8.5
* Server IPv4 Address
* Superuser Privileges (Sudo Access)
* Gnome Terminal for Linux Desktop
* PuTTy SSH Client for Windows or Mac
* Powershell for Windows 10/11
一、系统更新
首先是把 Rocky Linux 8.5 系统更新,这样就能使用一些修复的更新源、软件包等。你可以使用 yum 或者 dnf 命令,一样的。
1、登陆你的vps或者服务器
$ ssh root@ip地址
root@ip地址 password: (注意,这里输入的密码是不会显示的)
2、然后更新系统
$ dnf update
二、安装 Apache 2.4 Web 服务
1、可以使用 Rocky Linux 默认源来安装 Apache服务
$ dnf install httpd httpd-tools
--------------------显示的信息就简化了,后面的命令显示都用精简了-------------
httpd x86_64 2.4.37-43.module+el8.5.0+747+83fae388.3 appstream 1.4 M
httpd-tools x86_64 2.4.37-43.module+el8.5.0+747+83fae388.3 appstream 106 k
Installing dependencies:
apr x86_64 1.6.3-12.el8 appstream 128 k
apr-util x86_64 1.6.1-6.el8.1 appstream 104 k
httpd-filesystem noarch 2.4.37-43.module+el8.5.0+747+83fae388.3 appstream 39 k
mailcap noarch 2.1.48-3.el8 baseos 38 k
mod_http2 x86_64 1.15.7-3.module+el8.5.0+695+1fa8055e appstream 153 k
rocky-logos-httpd noarch 85.0-3.el8 baseos 22 k
...
Install 10 Packages
Total download size: 2.0 M
Installed size: 5.5 M
Is this ok [y/N]: y <------ 这里输入 y 继续安装
2、然后是,检查下安装的版本:
$ httpd -v
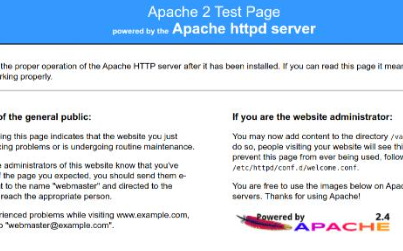
Server version: Apache/2.4.37 (rocky)
3、启用、开始、停止、重启及Apache服务状态检查
使用如下的命令:
启用Apache服务:$ systemctl enable httpd
开始Apache服务:$ systemctl start httpd
停止Apache服务:$ systemctl stop httpd
重启Apache服务:$ systemctl restart httpd
检查Apache服务状态:$ systemctl status httpd
三、安装 MariaDB 10.6 服务
MariaDB 10.6 在2021年就推出了,所以稳定性不用担心了。下面使用红帽的源。
1、添加red hat 源到 etc/yum.repos.d目录里
$ nano /etc/yum.repos.d/MariaDB.repo
------------------------------------------------------------------------
# MariaDB 10.6 RedHat repository list - created UTC
# https://mariadb.org/download/
[mariadb]
name = MariaDB
baseurl = https://atl.mirrors.knownhost.com/mariadb/yum/10.6/rhel8-amd64
module_hotfixes=1
gpgkey=https://atl.mirrors.knownhost.com/mariadb/yum/RPM-GPG-KEY-MariaDB
gpgcheck=1
2、然后可以安装 MariaDB 10.6 了
$ dnf install MariaDB-server
MariaDB 1.9 MB/s | 584 kB 00:00
DigitalOcean Agent 124 kB/s | 3.3 kB 00:00
DigitalOcean Droplet Agent 52 kB/s | 3.3 kB 00:00
Dependencies resolved.
======================================================
Package Architecture Version Repository Size
======================================================
Installing:
MariaDB-server x86_64 10.6.7-1.el8 mariadb 25 M
Installing dependencies:
MariaDB-client x86_64 10.6.7-1.el8 mariadb 14 M
....
Transaction Summary
======================================================
Install 54 Packages
Total download size: 67 M
Installed size: 298 M
Is this ok [y/N]: y <------ 这里输入 y 继续安装
3、检查安装的版本:
$ mysql -V
mysql Ver 15.1 Distrib 10.6.7-MariaDB, for Linux (x86_64) using readline 5.1
4、管理 MariaDB 服务的命令:
启用 MariaDB 服务:
$ systemctl enable mariadb
开启 MariaDB 服务:
$ systemctl start mariadb
停止 MariaDB 服务:
$ systemctl stop mariadb
重启 MariaDB 服务:
$ systemctl restart mariadb
检查 MariaDB 服务状态:
$ systemctl status mariadb
5、保护 MariaDB 数据库
你安装完 MariaDB 数据库服务后,必须要进行的这一步,别忘了设置 MariaDB 数据库root用户的密码,注意不是你的 Rocky Linux 8.5 的root用户密码哦。
$ mysql_secure_installation
NOTE: RUNNING ALL PARTS OF THIS SCRIPT IS RECOMMENDED FOR ALL MariaDB
SERVERS IN PRODUCTION USE! PLEASE READ EACH STEP CAREFULLY!
In order to log into MariaDB to secure it, we'll need the current
password for the root user. If you've just installed MariaDB, and
haven't set the root password yet, you should just press enter here.
....
Enter current password for root (enter for none): <-- 直接回车
.....
Switch to unix_socket authentication [Y/n] <-- n
.....
Change the root password? [Y/n] <-- y
New password: <-- 在此输入你想要设置的数据库root用户密码
Re-enter new password: <-- 再次重复输入你想要设置的数据库root用户密码
....
Remove anonymous users? [Y/n] <-- y
.....
Disallow root login remotely? [Y/n] <-- y
....
Remove test database and access to it? [Y/n] <-- y
.....
Reload privilege tables now? [Y/n] <-- y
四、安装 PHP 8.1
1、添加 epel 和 remi 的源
$ dnf install https://rpms.remirepo.net/enterprise/remi-release-8.rpm
Install 2 Packages
Total size: 52 k
Total download size: 23 k
Installed size: 59 k
Is this ok [y/N]: <-- y
看看结果:
$ rpm -qa | grep remi
remi-release-8.5-3.el8.remi.noarch
$ rpm -qa | grep epel
epel-release-8-13.el8.noarch
2、安装 PHP8.1
1)先检查可用的PHP版本
$ dnf module list php
几个问答,都是 y 回答就可以。
2)启用 REMI php 8.1
$ dnf module enable php:remi-8.1
3)安装 PHP8.1 及常用模块
$ dnf install php php-bcmath php-cli php-common php-gd php-imap php-mbstring php-mcrypt php-mysql php-mysqlnd php-pdo php-soap php-tidy php-xml php-xmlrpc php-opcache php-redis php-pecl-mcrypt php-brotli
....
Install 41 Packages
Total download size: 16 M
Installed size: 64 M
Is this ok [y/N]: y
4)检查安装的版本:
$ php -v
PHP 8.1.5 (cli) (built: Apr 12 2022 16:19:58) (NTS gcc x86_64)
Copyright (c) The PHP Group
小结:这样我们就完成了 Rocky Linux 8.5 系统上安装 LAMP 网站环境的搭建,后续就是创建 Apache 虚拟主机来运行网站了。
最后,这个教程如有错误或者疏漏,欢迎在下面留言、交流,会尽力解答的,谢谢!